What is monochromatic colour?
Monochromatic light is referring to a colour scheme. This colour scheme is comprised of different shades/variations
of one colour.
Any colour can be used on the scheme.
The colour I chose for our
monochromatic assignment is pink,
mainly because that is actually the
only colour in my house due to two of
my younger sisters.
These images are all going to look
quite young and childish, some aren't
going to look as childish.
The image on the left is of a torch, pink
lego pieces – some scattered around
on the floor and some attached to the
larger piece – a sequined bow, two
scrunchies and in the bottom right
hand corner theres a headband with
pink flowers. I have arranged the
objects randomly but also make sure
they’re not messy looking. I’ve tried to
make it a neat – ish appearance.
The image on the left is of a torch, pink
lego – again attached to the larger
piece – , I leant my phone up against
the lego because you could argue that
it’s pink and there is a braclet my sister
made and I thought it goes well with
the image. Same as the one on the left
I arranged them randomly but made
sure every object was shown and
looked neat.
The image on the left is of a torch, a
waterbottle, lego which has been scattered
around randomly, two scrunchies which are
different shades of pink, pink (fake) flowers
and a sequined bow. This arrangment was put
into a bit more care and consideration I had to
try and not make the image have any empty
space and, using the lego, I would try and fill
most of the space but using different sized
lego pieces.
The image on the right is of a headband with
pink flowers in the top left corner, a sequined,
sparkly bow, a ruler down in the bottom left
croner, two scrunchies overlapping and
different sized oieces of lego. I arranged these
objects randomly but used different angles to
try and get the best shot.
The image on the right is composed of a
water bottle, a headband with flowers
attached on the top, a ruler you can just
about see at the bottom of the bottle,
pieces of lego, two scrunchies and a
sequined bow. This arrangment was taken
into a bit more care than the image on the
left because I didn’t have as many larger
objects to lean the smaller objects on.
The image on the left is composed of a
headband, a sequined bow, two scrunchies,
a torch, lego and my phone. I have arranged
the objects very randomly and leant them
up against/around the larger objects.
The image on the left is composed of a
scrunchie, my phone, a ruler, a torch and lego
with smaller pieces attached to the larger
piece/platform. This arrangement was taken a
bit more into care because I tried to lean
eveything up around the lego so there would
be a sturdy background but I made sure not to
cover the lego fully.
The image on the right is composed of more
items compared to the image on the left, it is
composed of a torch, two scrunchies, a
waterbottle, a sequined bow, lego – platform
and randoms smaller pieces scattered on the
floor and platform – and in the bottom right
hand corner a headband with pink fake
flowers.
This arrangment was quite random and if
there was a patch of negative space I would do
what I did with one of my others image and
filled it with a small piece of lego.
Stephanie Gonot is a Los – Angeles
based comtemporary
photographer and director.
Halloween Candy:
Stephanie Gonot explored light, colour and shadows in her
project “Halloween Candy” for NYLON magazine.
The images are composed of American branded candy which
are bright and colourful and has placed them at different
angles so there is a different amount of light and shadow
reflecting on each piece of candy. Gonot has also given all the
images a retro, 80’s theme. The candy has been shot on a
mixture of plain and geometric surfaces and the candy has
been arranged in patterns and are co – ordinated with each
other.
The images have been taken from a birds – eye view, at least
that’s what it is portrayed to look like. The reason I said that
is because how the images have been taken they look like
they have been looked down on causing them to be shot by
birdseye view.
On her website, Gonot has mentioned she likes everything
“colourful, humorous and edible”. Sweets are edible and she
has combined her hobby and her admiration of food together
into a piece of artwork. Gonot has colour co-ordinated the
sweets to the background colour. She has used directectional
studio lighting in her images as her light source in the images.
The image below consists of a beige piece of fabric as the background and
a range of different sized glasses. I have arranged them so the shadows
didn’t overlap. When editing the photos, I adjusted the contrast on the
images slightly and this helped the details stand out an were a lot clearer.
The image above consists of the same to items as the other one, a beige piece
of fabric and a range of different sized and designed glasses. I figured, when
arranging these glasses, that the larger glasses are designed differently but
when the sun reflects on the glass at a certain angle, the details are different. (
I think it’s because of the scratches, after all they are very old glasses). I angled
the glasses so that the designs were more visible and there were more of
them.
The image below is composed of a beige small/ medium sized piece of fabric
with the different glasses , small and large, some detailed differently
compared to others. I arranged the glasses randomly but making sure the
shadows didn’t overlap, blocking the details the light has reflected off of the
the glass – especially the mkddle glass. The middle glass gives the effect of
ripples, in water for example, because the lines arent straight they are in
fact curved.
The image above is also composed of the same small/ medium sized piece of
fabric which is coloured beige, the colour I chose for this set of images. In this
image I only used two glasses whereas in the three images beforehand I used
three glasses, one large/medium sized glass with a very interesting detail when
put up against light and two smaller glasses which don’t have as much detail when
put up against light.
The image below, just like every other image, is composed of a beige
piece of fabric and and three different glasses.
I arranged these glasses randomly but my aim was to make the glass in
the middle the main focus, the most interesting part of the image. The
lighting was different in this image compared to the previous images and
it caused the details to be bolder, darker and I liked the effect it gave on
the image.
The image above has been composed of three glasses, one larger glass and two
smaller glasses and a piece of fabric which is beige, the colour of my new set of
monochromatic colour images for project number two - colour and light.
I arranged these glasses randomly just like the image on the left, however, instead
of making the middle glass the main focus, I moved the glass at the very back
forward so you could see more of the shadow and the outline of the two smaller
glasses was bold and appealing to the image. I also like the faint details inside the
bold outline of the glass.
These two basic edits are different to the
previous six edits.
They were taken differently and were shot
in brighter lighting.
The image on the left and the right are
composed of two large glasses and one
smaller glass as well as the beige piece of
fabric. I decided – with both these images –
to change it up a bit. I have used tow larger
galsses which are more detailed and this is
demonstrated in the images. The smaller
glasses when faced against the light gives
the the shadow a dark, bold outline of the
glass with faint lines and designs in the
centre. On the other hand, the larger
glasses when faced against light doesn’t
really give the shadow an outlines, instead
the details representing the centre of the
glass are medium shade, neat and very co –
ordinating. They seem evenly spaced out
and each line has a different thickness, this
is one of my favourite parts of the image/s.
ARLO 1:
Meeting/Exceeding
You have started with a range of
slides about colour and light –
some are illustrated with images
but many are not. (Did you use
Canva for your title page for the
Texture project? Bc that looked
good-maybe use this again to
layout images to illustrate the text
on those slides?).
Really love the quote you included
about light. It is so true. Might
print this out and display in the
classroom!
Response to Gonot's work is good-
you clearly identify the key aspects
about her work and talk about the
images in detail using the key
vocab.
ARLO 2: ARLO 3: ARLO 4:
Meeting/Exceeding Meeting/Exceeding Not applicable
All of your edits are really strong and you annotate Really consistently good images, excellent use of the
them purposefully. The second image on slide 13 is directional light to create shadows adding to the
really well constructed and composed. The edits from composition. With your first C/S you can see you have
the last set I think would look better a bit desaturated only photographed from one static position-
just to mute down the colour a bit – it will help it remember to move around to find the most
appear more monochromatic. interesting shots (BTW you have done that with the
last set of images, so well done). Other C/S's aren't
Also, on a couple of extra new slides, experiment with presented yet so can't comment on them.
really cropping in to make the images seem more
abstract.
Joiners
By Zoe Thomas
David Hockney
Cubism These two pieces of artwork are two of Picasso’s famous Cubist artworks. The image on the left is called “The
Accordionist”, it is abstract and had different colours and tone of black and grey. The image on the right is
What is cubism? called
“Brick Factory of Tortosa”, it is full of different colours and has a geometric appearance.
Cubism is a revolutionary new These two pieces of Cubist artwork have a similar appearance to David Hockney’s joiners. Both Picasso's
approach which represents the Cubist work and Hockney’s joiner’s are disassembled pieces of work, abstract. Both artists have tried to
reality invented around 1907- represent the world as it appeared at that current time. They have presented three – dimensional objects and
1908. Artists like Pablo Picasso scenes on a two – dimensional platform. These pieces of artwork are unique, out of the ordinary and are
and George Braques are the two composite - this is what makes them unique. There are different tones of colour demonstrated in both images
artists that come up the idea of and have been separated in different segments put together over – lapping, like a collage. The final results of
Cubism. The two artists the images have a distorted perspective, there is an image hidden amongst all the segmented pieces of colour.
combined two different views of The images are like a puzzle, you have to work out what the image is behind the piece of artwork, what
the subject which usually inspired the image?
consisted of objects or figures
together in the same picture. It
resulted in paintings which
appear abstracted and
fragmented.
Cubist artwork is composite, it is
made up of a variety of different
shaped pieces. The artwork itself
is quite puzzle – like as if it is a
puzzle and you have to match
the pieces. The images are
collages, each piece overlaps
another. Like I previously said,
the final results turn out
abstracted and unique, nothing
like other artists artwork.
Joiners
What is a joiner?
A joiner is created of many
photographs of the same
subject from different
perspectives/angles.
Hockney created joiners in
February 1982 and was first
used with polaroid film.
Joiners are very different
compared to
ordinary/normal
photographs, nothing like a
standard image. The
images are composite,
made up of multiple pieces
and put them together as
though they were a puzzle.
The images appear quite
pixelated and distorted.
The grid layout of the
polaroids are all organised
and neat, the placement of
each different polaroid has
been taken into a lot of care
and consideration.
“Pearblossom Highway” The whole idea of Hockney’s artwork, “Pearblossom Highway”, was to
illustrate a story, a story for Vanity Fair. To get this image, they needed to
In my opinion, joiners show a more accurate sense of how we find a side road because they knew how complex the task would be. The signs
see than a normal photograph taken from one vantage point were close to each others which gave the side road a benefitial feature.
because it shows that there are different views behind a Hockney spent ten whole days taking photographs, wondering which one will
photograph, different aspects of the same scene. You can’t tell be used. He tried different angles and viewpoints. In total, throughout the
a whole story just by basing it off of one image, joiners show ten days, Hockney managed to take, roughly, 800 photos. Looking at the
different views of the same subject which benefits the image image, it looks like it has been taken as though it is a central viewpoint, a
and the story behind it. Joiners show multiple aspects of a traditional perspective. The unique thing about this technique is that none of
scene and give the image more detail into the images the images were taken from central viewpoint, not a single one. They were all
background. taken from all over, the images are either looking down the road, looking up
the road, looking pretty much every direction.
Hockney’s first place he photographed was the stop sign that you can briefly
see in the far distance of the image. All the images were taken close to the
object, for example, if he is photographing signs they have been taken quite
close - up. The reason why they were so close to each other is to make you
feel as though you are part of the image because they are so close, you are
close to everything. He discovered that cameras try to push you away but the
aim of the image was to pull you in.
There has been a debate over whether this piece of artwork is a painting, a
photograph, a drawing or all three. One of Hockney’s photographic friends
believed it was a painting. On the other hand, Hockney said it was
photography, even though he did mention “one did paint the sky.”, because
you can decide on blues. Photographing the sky can be easy but when
printing the image, the sky can appear lighter or darker so he was technically
creating which type of blue he wanted as the sky – just like an artist would
not a photographer. The sky in this image has been created out of around
200 hundred, separate, pieces. When creating this image and using this
technique, he managed to move around some of the trees.
When he first did collages, he called it join with a camera because when
joining things together you make choices because no hears or sees the same
thing as another person.
Thomas Kellner is a German
photographer who is best know for
his fractured architecture artwork.
He was awarded YoungProffesionals
Prize and that is when he decided he
wanted art and photography to be his
future career. Kellner focuses on
famous landmarks, European
monuments, for example:
• Eiffel Tower, Paris
• Tower Bridge, London
• Big Ben, London
• Stonhenge, England & loads
more.
In my opinion, Kellner’s Fractured
Architechture is very composite,
made up of multiple parts and are
pieced together as though it was a
puzzle. I find the artwork very unque
and out of the ordinary because each
image has a different arrangement
some of the buildings look nothing
like they do in real life. Some of them
are more neat and you can easily tell
which building it is and its more
recognizable, some are the total
oposite. These images are created out
of contact sheets made using film.
Thomas Kellner developed pinhole series, photogram work and printings in alternative techniques, techniques such
as cyantype salt paper and multiple other photographic, artistic techniques. Most people who say that he has
constructed something brand new. However, Kellner mentions that he doesn’t necessarily deconstruct the images
of the famous pieces of architechture but instead reconstructs our view of the architechture from a different
appearance and I totally agree, just because the image may not look like the building doesn’t mean it isn’t the same
building that it was before the images were taken. His artwork has been shown all of America, Africa, Australia,
Europe and Asia, as well as more than 300 solo and group shows he has particpated.
Kellner’s artwork was inspired by the Cubist art movement - cubism is a revolutionary new approach taken towards
art to represent a new appearance of reality in around 1907-08. Cubist work is very abstract and geometric
(example in top right corner). Kellner’s idea is quite similar to the Cubism arts movement, they both wanted to
create something new through the same type of design, fractionating all the pieces of art into geometric shapes
and creating an abstract result as their finished artwork.
Analogue photography, this is what Kellner has used to make these images. Using 35mm film and an analogue
camera, he has created contact sheets using the film and lining them up together with others rows of film. The light
interacts with the chemicals in the film recording the image on to the film. Each photograph is taken at a different
viewpoint and angle to every other image in the contact sheet but keeping the same distance away from the
building. After taking multiple photographs, the segmented photos get turned into a contact sheet creating the
buildings new appearance. Using Big Ben as an example (on the right), Kellner has assembled the photographs
taken on the film and has given the image a different appearance, a makeover. It looks nothing like the original
building, intead of the edges of the building being straight and solid they are curvy and intertwined with eachother,
plaited.
Kellner’s artwork is very iconic: it uses popular architecture and has been combined with the same idea of cubism.
At the same time, it is exploring multiple viewpoints and angles of the building which I find very interesting. Every
artist has their own different, iconic techique and mixing analogue photography with the idea of cubism is Thomas
Kellner’s special, famous technique.
More about Thomas Kellner: “ I think I am more of an artist than a photographer.
There are definitions in art about
• Kellner achieved a membership to the German “construction/deconstruction” or
Association for Photography (DGPh) “collage/decollage”, but I don’t think any of it really
”fits what I am doing right now.
The association is bsaed in Cologne, Germany. The applications Many have said it is “very German” and that might
are endless, you can apply for photography in art, science, b~eThveormyacsloser.
education, journalism, economics and politics in cultural Kellner
contexts. The association also hosts public events for people to
attend such as festivals.
The German Association for Photography was set up in 1951
by a proffessor called L. Fritz Gruber. There are over 900
members which participate in the association: they are
researchers, inventors, creative photographers, journalists,
doctors, teachers, organizers, scientists, managers and
economics.
• Kellner is mostly known for his colour works
which he started in 1999.
• He started with only black and white
Black and white has a stronger focus on the images and
relations between object and form. There is also a clearer
image when the photographs are black and white.
KELLNER vs HOCKNEY Both of these pieces of artwork are by Thomas Kellner (left) and David
Hockney (right) and the two artists have a few similar qualities and many
differences.
Both Kellner and Hockney were inspired by the Cubist Art Movement and featured it in their work in their
own creative iconic ways. Kellner’s work is very composite and so is Hockney’s, they both look like a puzzle
that has been put together and each puzzle is a different photograph of the scene. These two example give
the appearance of having a face on perspective. They have also been created through geometric patterns
and abstract techniques. Both of the artists have used the same technique but has made sure to give every
piece of work a different appearance, nothing like the previous piece of artwork.
On the other hand, both artists are quite different. Kellner’s work is presented through contact sheet made
on 35mm film and an analogue camera. His work seems very stationary, it looks as though he is the same
distance away from the building throughout all the photographs. Comparing the amount of element ins
each piece of artwork Kellner, in this image, as use under 100 images: Hockney has used approximately 800
images. Kellner’s artwork is lack and white and not coloured and bright like Hockney’s. Kellner has
deconstructed the building to reconstruct it and made it look different, change our view on the building.
Hockney look as though he has combined the elements of the photos by overlapping them which you can
see by the faint lines. The distance which the photos were taken look very different, some look like close –
up photos others look like they are from quite far distance. As well as different distances they have also
been taken at different angles and viewpoints. Personally, I find Kellner’s work more interesting
because he has explored the world and has taken
photos of popular landmarks which everyone, if
not most people, would recognize. He has also
explored making the artwork both coloured and
black and white. I specifically like his “joiners”
which have created a new appearance of the
building, just because it has a different
appearance doesn’t mean it isn’t the same
building. These images give across the message
that just because the architecture doesn’t look
the same doesn’t mean it isn’t what it was
originally.
Annotation:
This technique was a bit different to the first joiner of
the outside table. This process went around, up the
line then left and down, right then up. It was a joined
line an didn’t break – it’s quite hard to eplain but
that was the technique I used. I pieced it all together
by copying ll the images on a powerpoint slide and
minimising them so they all fit to scale on the slide, I
had to picture a 5 x 5 grid on the slide so I could fit all
the images.
Evaluation:
I will admit it did come out a lot better than I
thought. I added more photos than the first joiner.
Even though I struggled a lot with both of them, I am
pretty proud of how they came out, it is obvious
what the images are but nect time I would make sure
I got them all in line, in the second row the first
image I had to crop it bcause it wasn’t in line with the
top left image an it looked a bit odd.
Annotation:
I took these images in rows going from the bottom to
the top. I sectioned the “rows” into three , this was
my first attempt so I didn’t used too many image, I
just wanted it to be quite simple so I could get the
hang of it. In the next slide is the final result. I pieced
them together the same way I took the images, for
example, the first image went in the bottom left
corner the next two went above and the fourth went
to the right of the very first image and the process
just repeats itself.
Evaluation:
It isn’t the best work but I knew that from the very
beginning I wouldn’t be able to do it, it may look easy
but it’s quite advanced. I found the whole thing quite
tricky so neither of the pieces of work are very good:
that’s just my opinion though. I prefer this one to my
second one I have to admit. It is obvious what the
image is and that is one of the strengths of my joiner.
Martin Wilson is a contemporary British Martin Wilson’s technique:
photographer based in Nottingham, England.
At Christmas in 1975, Wilson was given a camera The results are created frame by frame on 35mm film.
by his parents, him and his brother were given This is a very long process due to using film instead of a camera and
identical film cameras. They were coal black and computer.
petrol blue. Ever since then Wilson has loved After taking the images, he then has to develop the film – which can take
photography and developed a new hobby. quite a while. The developed photos then need to be scanned so they can
Wilson’s father told him, when he first received the be put together row by row on a computer to be submitted.
camera on Christmas, to “make every image
count”. He wants to prove to his dad that he hasn’t
wasted a single shot, however, if he makes a
mistake he will start all over instead of editing it in
Photoshop and making it look right.
How does Wilson do his lettering?:
Wilson has used lettering in multiple different styles throughout his
photography career. There are two different was he does the writing, he
uses individual letters and full words. He has used road signs for words
and in the example above they are just single letters. This has been done
through LED lights. Each letter has their own different style, none of the
same styled letters are next to each others.
Martin Wilson uses word play in a lot of his photography work. All the
words/letters make us quotes, nursery rhymes and just general common
sayings.
The text says “100”. It’s different to the other The reason why I really admire this image is because it is iconic when put against other pieces of art
images because the text is a umber, not a saying, created by Wilson. What I mean by this is that it is a unique piece of art which has a different
not a quote, not a nursery rhyme but a number. appearance compared to Wilson’s other photography work. Ithink it’s because it is a number, not a
The images are of the 100 years starting with 1906 quote or a common saying or a nursery rhyme like his others. I think it is successful because each year
all the way through to 2006, none of the years are is shown to be different and is in colour.
repeated and have all been taken from a different
setting.
Some of the images look like they have taken off of
a shop or house because it’s their address number.
On the other hand, there are some images which
look like they have been taken off of stone, like a
gravestone.
The grid of the image is different for each number.
The one has a grid of 9 frames down and 4 images
across. The two zeros have a grid of 9 frames down
and 6 images across. All the blank squares – which
are pitch black – are part of the frames which
Wilson hasn’t photographed anything. The rest of
the image is in colour so the background contrasts
the images.
Neon Light Box LEGO
!
Road signs
Posters Ways to make
lettering in images:
Signs/Frames you could
find around your house
These images were created from around my house. I
look for frames, posters, random stuff displayed on
my wall and just anything with lettering on really – I
even used a package off of bread out of my fridge
and used it as a ‘w’ in the word world.
The quote I used isn’t so much of a quote you hear
often but is the title of a song from a Disney movie.
‘A Whole New World’ has always been an inspiring
saying for me because each day is different and no
day has ever been the same for me. Each day
something different happens, good or bad, and it’s
almost as though each day I have walked into a
brand new headspace and environment around me.
That is a bit of background as to why I chose the
quote ‘A Whole New World’.
(Set 1)
This set of images I created differently compared
to the first set of images. These images were
created from objects, eg: bottles, coins, teddies,
utensils and more. I thought it would be fun to
make each set different so that’s what I did. The
different backgrounds make the image seem more
composite and sectioned.
The one thing that is similar in each joiner is that
both of the grids are 7 images across and 3 images
down.
I chose this quote because ever since I was
younger I have/still do hear the saing “Home
Sweet Home” and have always loved hearing it. So
I thought why not use it as part of my work now
that there is a reason too.
(Set 2)
(Set 1)
(Set 2)
Karl Blossfeldt
Walker Evans
Stephen Gill
Karl Blossfeldt is a german photographer who is recognised and known for his
close-up images of plants.
Blossfeldt started his photography career after being a sculptor for a couple years
of his life, however, he never qualified in photography and just developed the
talent quickly. Here I am focusing on Blossfeldt’s first collection of images called
“Unformen der Kunst”, which translates to Art forms in nature in English. The
collection is full of multiple images which are called typologies. A typology is a
classification according to a genreal type, in studies like psychology and scoial
studies. On the other hand, a photographic typology is a single photograph which
shares a high level of consistency. The photographs are of plants, such as flowers
and weirdly patterned leaves. They are created with a camera and lens which had
an increased magnification when photographing the object in the image. Each
image has a plain, light background which fills the negative spave around the
bold, dark object which is, roughly, placed in the centre of the image and it then
contrasts the background due to the massive difference in the tone of the image
compared to the background.
There are many objects I could use to create my own photographic typology,
these include:
• Detailed drinking glass of flower vase
• Flowers
• Utensils (fork, spoon, knife)
• Tools (hammer, spanner)
Typologies – Set Typologies – Set 2
1
Typologies – Set 3 Typologies – Set 4
Typologies –
Set 5
Typolgies – Set 1
I selected these specific items because in all typologies
which have been placed side by side, they all have
something in common. The thing they have in common is
that they are all of the same subject/genre. I photographed
different coloured scrunchies and ordered them in order,
almost, of lightest to darkest.
I folded a blanket to create a thick layer separating a long
grey sleeved t-shirt from the carpet on the floor in my
room. I smoothed out the shirt, removing all wrinkles there
were to make a smooth surface. There is a faint pencil dot
on the t-shirt so I could remember where I placed the last
scruchie, this made sure that the scrunchie remained
around the centre of every photo.
Typolgies – Set
2
I selected these items because they are also, like every other set of images I have
taken, all particpate in the same category. This category, as delightful as it sounds, is
of travel – sized toiletries.
I used the same technique as I did for the first set with this set of images. The last
three sets of images were taken differently.
Typologies – Set
3
The catogory of this set of images are squishies. I thought this would be
interesting because most famous artists who have vreated typologies have
used aldult objects, objects children are told to avoid: eg, tools. I thought it
would be a good idea to to a child themed set of images.
These last three sets were taken differently, but not by a large amount.
The only thing I changed was I folded two towels in half and then in half again
as a replacement for the blankets but proceeded to use the grey shirt as the
plain background.
Typologies – Set
4
The catogory these set of images share is stationary. Like the other set of images, I
tried to create a typology which is more child friendly and compared to tools. In this
set of images I have made sure that each images have an equal amount of negative
space around each object.
I used the same technique as the images in set 3.
Typologies – Set
5
This set of images is of my mums mug “collection”. I put air quotations on the word
collection due to the fact it isn’t so much of a collection she just has an admiration
for flowery mugs. I thought it would create an interesting typology, especially when
placed in a grid amongst others of similar appearance.
The technique used was the same as the images in sets 3 and 4.
This set of images is my favourite and, in my opinion, the mlst successful. The images
put in a grid like this one by one, next to each other just compliments the images
around another. Majority of the images have a flowery appearance and that is one
thing I admire of the images. The differences are that when images are put side by
side you see how differt each mug is different and unique and iconic for different
reason and you only just realise how some aremore zoomed in/closer than others.
Decollage: Retro dAffiche: Artypo:
Decollage is the process of revealing layers Similar to decollages, the basic elements of In typography, the artist makes a selection
as opposed to adding them and in Rotella’s creating this type of artwork is through the of printing proofs used to control the
case, he uses larger scaled images such as use of posters taken directly from the street. registry and quality of the images and
billboard posters and advertisements. This The technique was applied to the other side of colour. Posters which are normally
give off the juxtaposition of the tone of the paper where there were remaining traces destined to be torn up and threw away,
colours underneath compared to on the of rust, glue, flakes of paint and other deposits they are the reused and various images are
top surface. left. overprinted onto them.
Monday 4th January 2020
Bricolage Portraits
Starter:
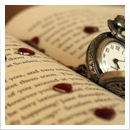
The image on the left is a bricolage portrait. Judging by the piece of artwork alone,
I can only assume that this person loves travelling. The evidence for this is that for
the background they have used a map and the objects placed on the top of the map
all resemble something to do with travelling.
There is a vintage camera which could suggest that this person id very creative
and likes to explore physically and creatively through art and photography.
In the top left corner, you may also notice that there are two compasses and
another one which has been placed on a book at the bottom of the image.
Compasses are a way of navigation when travelling which makes the compasses
another piece of evidence towards this person having an admiration of travelling.
The words you are searching are inside this book. To get more targeted content, please make full-text search by clicking here.
Grade 9 example. This is the digital sketchbook and there is also a physical sketchbook, together they are the Coursework Portfolio.
Discover the best professional documents and content resources in AnyFlip Document Base.
Search