My Bookcases
Once you sign up an AnyFlip account, you will be granted with a bookcase. After the flipbooks are published to AnyFlip Cloud Host, they will be shown in the Bookcase. Besides, you are also able to create multiple bookcases later.
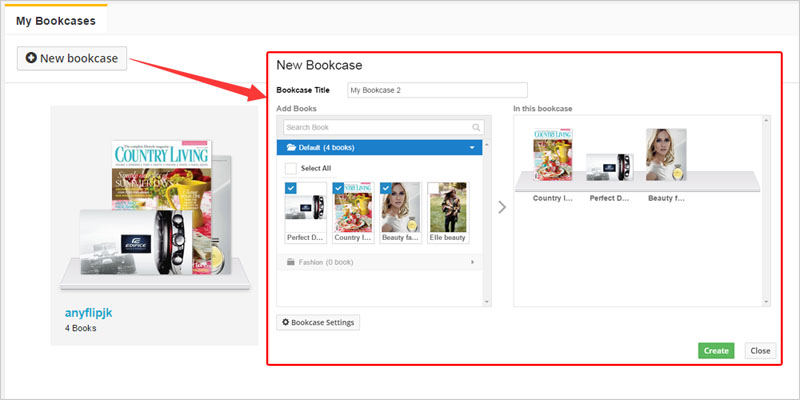
Click "New bookcase" to create a new bookcase. You can set Bookcase title and select published sliding catalogs to add to the new bookcase.
You can click "Bookcase Settings" to customize settings for the new Bookcase.
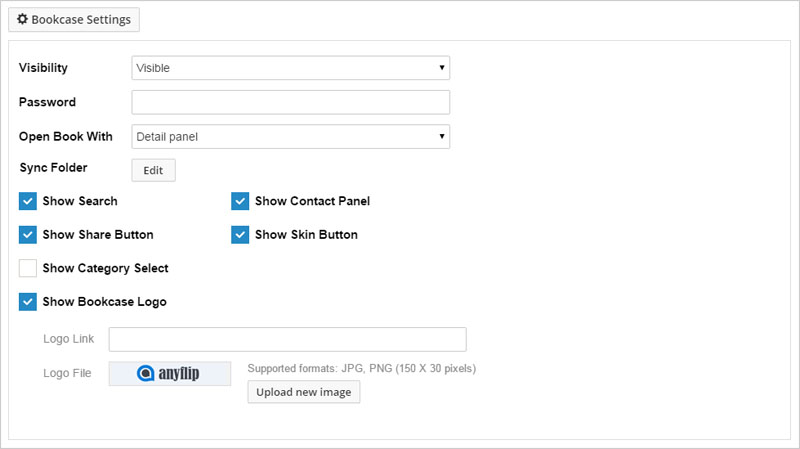
You can:
1) Show or hide the bookcase by selecting "Visible" or "Invisible";
2) Add password to set access permission so only readers that have valid password can access your bookcase;
3) Select Book Open method: Detail panel, Lightbox reader or New tab in browser;
4) Select Sync Folder: Select a folder as sync folder of the bookcase, and whenever you publish a new flipbook to this sync folder, the book will display in the bookcase synchronously. And you can select insert position as First or Last, and the newly added catalog will be placed at the first or last place of the bookcase.
5) Show buttons or tools while viewing the bookcase: Search, Contact Panel, Share Button, Skin Button, Category Select and Bookcase logo.

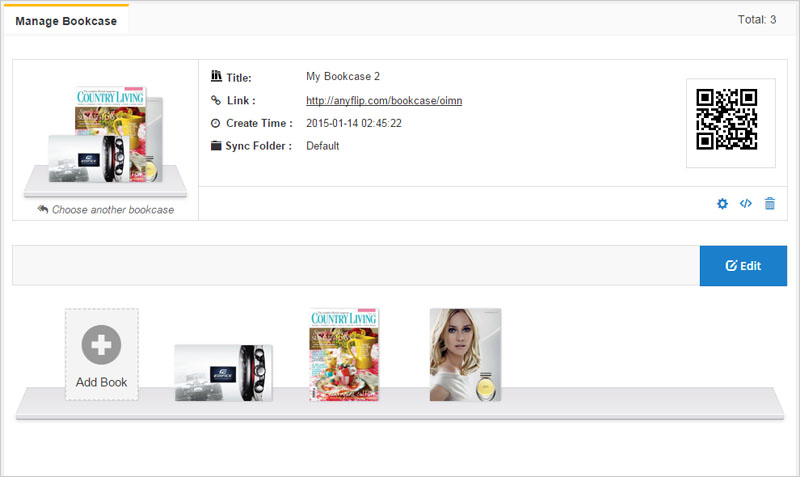
At last, click "Create" to create the Bookcase and you will get a unique link and QR code for the bookcase. And you can then manage the bookcase anytime later.
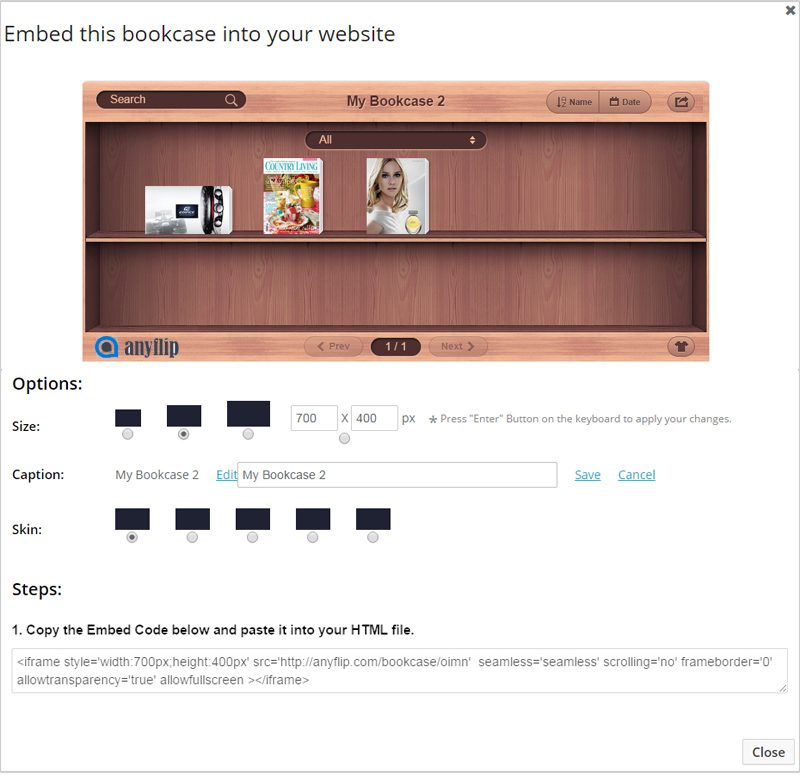
And it's very easy to embed the bookcase to your own web page. You can set embedded bookcase size, caption and skin.